Saturday, November 15, 2008

Legal

October 1st, 2008 I went to the local DMV office with all of my paper work and proof of insurance. My son and I had our first Y-Guides meeting that evening so I wasn't going to go and push my luck but after I put the tag on I couldn't resist.

It almost doesn't seem real, and honestly as much fun as it is to drive, I think building it was more fun.

I still have things to do but the list is much smaller and now I'll probably slow down a little more just to savor and enjoy what this amazing journey has been.

Many people driving a replica/kit Cobra get asked is it real; my answer: only in spirit,,, a light weight V-8 powered open roadster that wants to go fast!
Posted by Picasa

Short Drive

Quick look into the engine bay.

Tail lights are in and trunk latch.

First drive with the body on.

And a driveway shot.

Time for a body

Another fun day with my Dad in the garage. We put the body on and I think it went pretty well. I had added a support to my body buck to hold up the main dash area, it got hung when we were removing the body and had to set the body back down and remove the extra support.

Roll bars in place and quick jacks back on; starting to get some detail to it now.

Lights, camera, action!

My ride height is not at the suggested rear setting due to the peak in my drive way I needed a little extra clearance but I am happy with how the wheels are filling out the wheel wells.
Posted by Picasa

Seats, swirls, and belts

Seats installed and a look behind the dash. I think I mentioned it before but I had higher hopes for my dash wiring but due to trying to leave enough wire to be abhle to remove the dash without disconnecting everything there was a lot of wires to tuck away.
When I built my battery box I swirled the insides to erase any scratches and liked the way it looked. My wife did to and suggested I swirl Oall of the aluminum in the trunk. Whew, I did not know how much that was but I do like the end result.
One last look with seat belts, power controller, and the trunk aluminum.
Posted by Picasa

Power & Cooling

Here is the power distribution box that is part of the I squared system I used. Up front is a smaller controller that uses low voltage lines to all the switches and communicates to this box via a 10 pin serial cable.

This image grabbed my eye because of my build partner laying in the sun. I'm writing this blog wayyyy after the pictures were taken and our Chocolate Lab passed away back in October. Many good fond memories of working on the car with just her in the garage, or her sneaking up on me to see what I was doing.

Upper rad hose; I was able to use the stock mustang upper radiator hose and just make a cut in it to include the T. The cut was not as straight as I would like but thats me being picky.

The lower rad hose shown here was not as easy as the upper, thanks to the ffcobra forums I found a couple of part #'s available at Advance and Autozone that allowed me to use the hose shown here on the engine side, the Factory 5 supplied tube, and another hose on the radiator side. Also show here is a power steering bracket with auto tensioner that did not end up working out. It put the powersteering pulley into the steering shaft.
Posted by Picasa

Friday, August 22, 2008

Air, Fuel, & Spark

I found a lower intake from a Cobra on e-bay; it included the rail, injector and other stuff I didn't need. I gave the injector's to a friend and used the other parts for reference. Took it to the local machine shop and had them bead blast it and clean it for like 15 bucks.
Here's what it looks like installed with spark plug wires.

A look at the fuel lines and filter.

And a shot with the GT-40 upper intake. Yes it was pricey but it was one of the things I had in my mind from the beginning so I got it. Also notice at the bottom of this picture the radiator is installed!
Posted by Picasa

Sunday, August 10, 2008

That day

Writing most of these posts well after I have the car running, driving, and body on I can say that I have had many satisfying moments during the build. However this day stands out as my favorite. Several reasons for saying that. One, a crate motor!
Two, notice the weird green t-shirt, my wife had 2 requirements for approving this project. 1, dual rollbars; 2, I did not put building the car in front of my family. I'd be lying if I said I never put the car in front of playing with my kids, it happens sometimes but I did strive to make sure it was the exception and not the rule. Case and point was coaching my son's 5 & 6 year old soccer team because there were not enough coaches. The Saturday morning of the first weekend the motor was available, we had a game. I was going to have the other coach take care of it and my Dad and I would go get the motor first thing in the morning. On Thursday I knew that was the wrong thing to do. I went to the game and my son did not get a goal or a foot on the ball for that matter, well maybe one foot but I am so glad I went to that game instead of going first thing to get this engine.

Three, getting to go pick up, unpack, unload, and install the engine with my Dad was the best.
Fourth, seeing the engine and transmission in the car...

Posted by Picasa

Uh oh!

As with most things in life I have had a few problems during this journey. One of them was the transmission I bought, a TKO500, came broken. I used that transmission to be able to change the shifter location to a modern shifter not really for the torque capability. I bought it from a vendor who I am not going to name because I have mixed feelings about. While they were knowledgeable and sort of friendly they were also a bit rough around the edges and just not as good as others I have worked with.
Regarding this issue they replaced the broken shifter tower but at UPS's cost because the transmission had been dropped on the shift tower.
Posted by Picasa

Wiring

I should have started the wiring while I waited for wheels that were on back order but I had path in mind on the build order and stuck to it instead. By the time I got to wiring it was middle of summer and hot, hot work in the garage especially since I wanted to solder all of my splices.

I used a dash wiring kit and an electrical control system from a company named I Squared. Great products both of them. I had hoped to leave enough extra length on the dash connections that I could pull it off of the frame if needed. That did not work out quite like I wanted due to more wires to the dash than I had as available quick disconnects.

A quick look with the dash installed:

And this is the main power controller (shown in the photo below) that talks to the small communications box behind the dash (shown in the above photo). Tie straps were just temporary during wiring layout.
Posted by Picasa

Slow in, Fast out.

Got to be able to slow down and here's a look at how I'll be braking. I am of the opinion that of all things on a car, the most important, above all else is the tire. For me it's simple no matter how big the engine, how great the suspension, how massive the brakes, all of it has to be put to the ground and the tire is that interface. I chose BF Goodrich G-force T/A KD ; KD = key characteristic dry :). Up front 245/45 17's and 315/35 17's in the rear. For the brakes I went with Powerslot 13" rotors up front and 10.65" in the rear with 2 piston Cobra calipers.
The kit comes provided with a roll of 25' of steel brake line which I worried about originally but found to be a fun and enjoyable part of the build. Below you can see the lines routing to the master cylinder, which is from a 96 GT. This model used a hydro-boost unit which I chose to avoid brake boost being low at lower idles with vacuum style power brakes. Also, one might argue boosted brakes aren't necessary on such a light car; fair comment. I just rememberd manual brakes on my '66 Mustang and wanted to transition from a daily driver to this car without a significant different feel.

A little closer look where you can see the flexible loop to allow for any imperfections and re-alignment to fit the frame and master cylinder.
Posted by Picasa

Sunday, July 20, 2008

Not a "Death Star" alignment

...and what I mean is there was no "LASER" involved in this alignment. Neat thing about the Cobra is they used quick jacks to quickly jack the car up during races. The quick jack's are NOT functional on this car (in my opinion) BUT they make excellent brackets for performing alignment. I marked two pieces of PVC at the same length with a small groove at each end made by a pipe cutter. Then I dropped a piece of fishing string over the grooves with weights from each end. Measuring each corner off of the main frame rails I adjsusted the rails till the lines were equadistant on left and right sides and at front and rear.


Once that is done the great thing is the lines move with the car. Since this is IRS I adjusted the toe and camber of the rear. Toe I set by measureing with a caliper from the string to the wheel at front and rear until even. Camber I have just set by running a level on top of the tread for now.


Then I went up front and left caster alone for now and set toe and camber up front... I set toe out just slightly. All of this was good learning but really for nothing since my ride height and caster was going to change up front.
Posted by Picasa

It's a Roller!!!

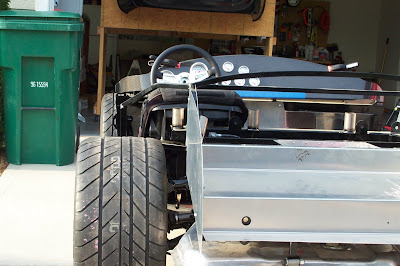
After a 2 month back order, thanks to the Chinese new year, my wheels showed up. I had the tires for a while (BF Goodrich T/A G-force KD's; 245/45/R17's up front and 315/35/R17's in the back) and waited and waited and waited for the wheels. These are knock-offs of a Ford FR-500 wheel; the Ford Racing wheel is only available in 18x9, these are 17x9 up front and 17x 10.5 in the rear to accomodate the 315's. With hind sight I wish I had started the wiring but I had a very one track mind and just kep working the frame.

I returned one of the rear tires, not once, but twice; when I received the tires they all had "cleets" on them but one rear tire and it had a small area that looked wore. After the second return and talking to a technical specialist at BF Goodrich I found out they use a balancing operation on some of their tires and what I was seeing was the result of that. The proof is in th puding so to speak as I found out when the tires were balanced and the one that looked wore slightly was just barely off and the other that had not signs of factory balancing took quite a bit more wheel weights (but nothing abnormal).

Prior to setting ride height or any weight I rolled it out for the first time.
Posted by Picasa